Circle of Souls
Hello this is a guide to help you learn Kedge Keep before you actually explore there or if you need help on going farther in. Ok well first I will show you the maps. There are 3 maps, 1 for each level basically. This dungeon is very unique in that you dont just go side to side but up and down. Most of the time you are moving down rather than sideways to go deeper.
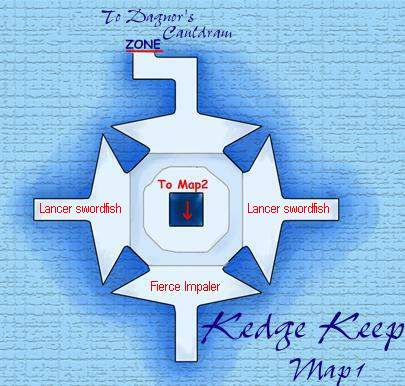
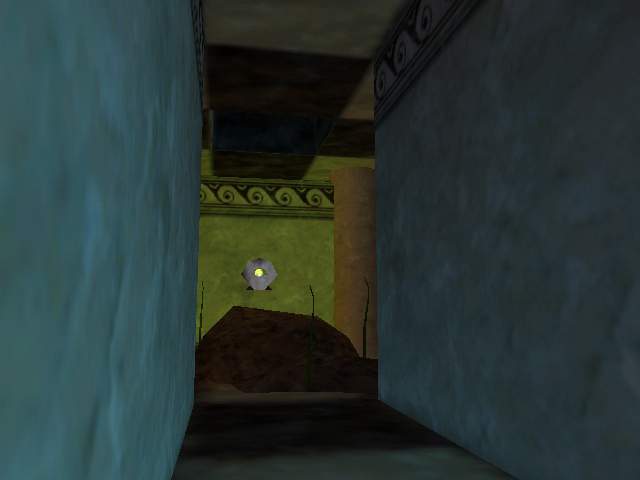
Ok now that you seen the maps you are probably real confused =) So I will try and give you a feel of what it looks like. When you first enter the zone you will come to a little ledge with a fallen over pillar on it. If you swim up to the pillar and stand on it you will see this next picture.
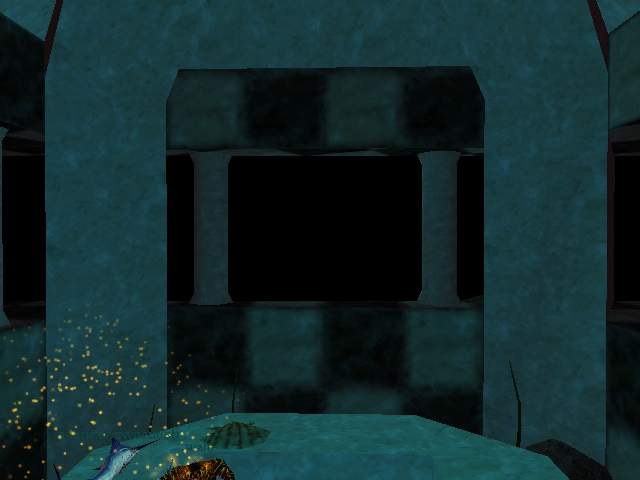
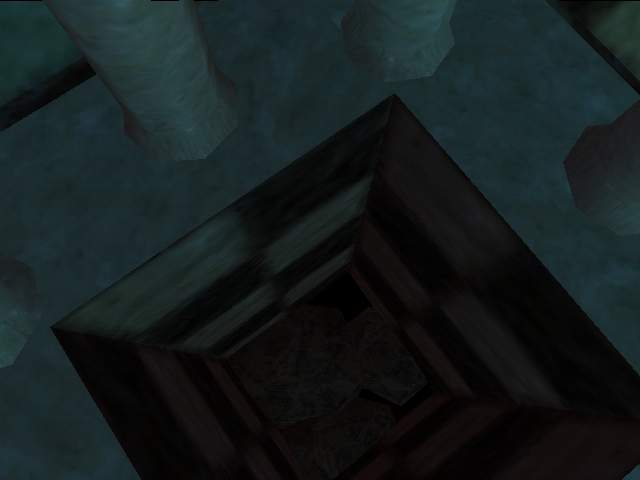
As you look in the picture you can slightly see the wall across the way. There is a little alcove there, thats where the fierce impaler spawns.(labeled on the map) He is around level 45 and drops the seahorse scale cloak or deepwater harpoon. Do not try him without a full group of 40+'s. To the right and left there are similar alcoves where lancer swordfish spawn. These are around 30-35. They roam from the left to the right and right to left. Also you can see in the middle of this room there is a tunnel going down. This is how you go deeper into the dungeon. When you go down it opens into a bigger room just like the top, DO NOT go to the bottom of this tunnel. Before you get all the way down a roaming piercer or impaler swordfish will probably attack you. Pull it to the top and kill it before moving down. The tunnel comes to a dead end after a short bit and there are normally 2 piranhas in it. These can range from around 39-45 I believe. One is not a problem for a good group but two can mean instant death without an enchanter to mez or a shaman to slow them. Well this next picture shows the bottom of the tunnel where you should NOT go.
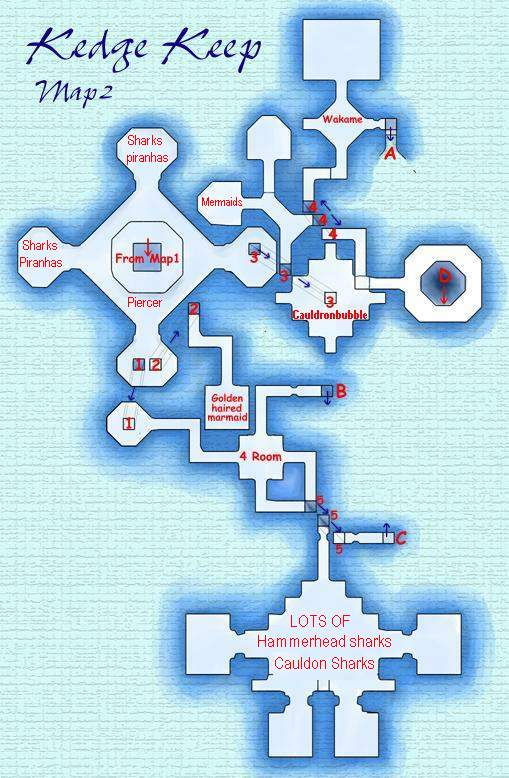
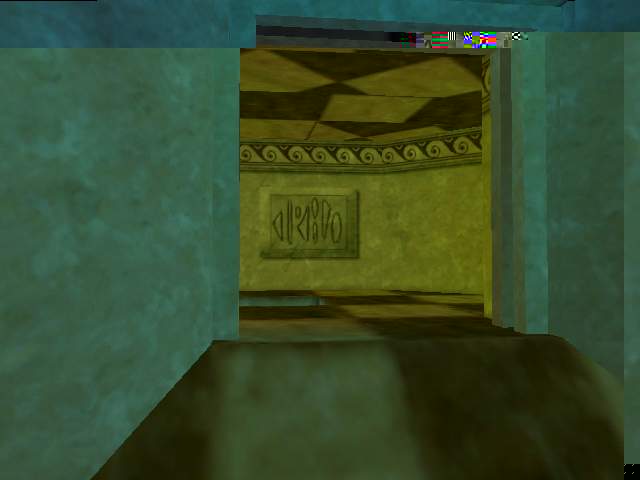
After you get down this tunnel and turn to straiten out into the large room there are 4 rooms off of this center room just like above. Two of the rooms contain tunnels and two contain fish normally. The fish can range from piercers to hammerhead sharks so be carefull and con everything before you pull. It is advised that you pull this area before moving down. Well the rooms with tunnels can be told apart because one room has 1 tunnel and the other has 2. These next two pictures show those two rooms.
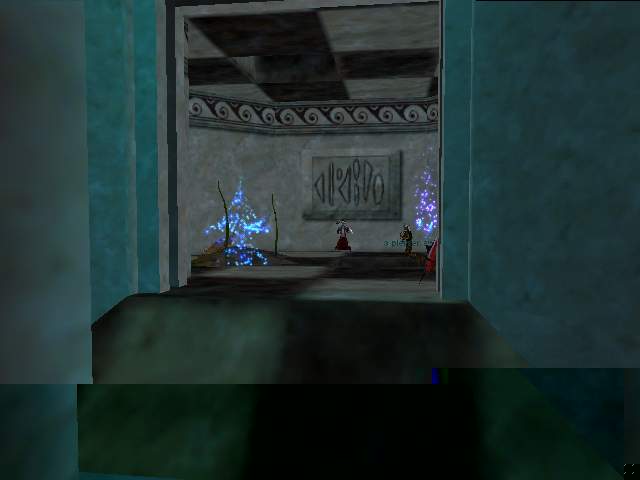
I would advise you to clear any fish in the room with the single tunnel as this is a good spot to camp and pull to. There should be no fish in this room but sometimes one will wander in. Ok so now you are all safe and sitting in a room with a tunnel going down. If you go down this tunnel you will come to a tunnel that branches off to the side. This tunnel goes to a mermaid section. Be very carefull if you go in here as you can not pull just one. They are agro if you ever killed a mermaid or are an evil race. This next picture shows that split off tunnel.
If instead you chose to keep going down which is better you will come to a small room where there are normally one or two sharks. These will be very tough to kill together. If you are lucky one of the sharks will be Cauldronbubble. He is a level 49 hammerhead shark. He hits for around 130. He drops some spear commonly and the hammerhead helmet rarely(13ac, 7str, 7sta). To see where this room is on the map refer to the spot labeled with Cauldronbubble.
Ok now once this bottom room is cleared you may want to go to the other room with the two tunnels. This room is normally totally safe with nothing in it and nothing spawns in it. If you go up the tunnel you will come to the spawn spot of the golden haired mermaid(labeled on the map) There is normally a mermaid and a piranha in this room so be ready. Have cancel magic up as the mermaids use damage shields. This is what the room looks like. There is also a piranha above the mermaid in that little tunnel looking spot. He will not come when you pull the mermaid but you can get it after.
Now after that room is clear you can go down from the main room you were pulling to if you want or choose to go back to the other tunnel room and try the side tunnel. Either choice is very tough and will require a good group if not more than one. I have not been in the side spot near Cauldronbubble's spawn, where some mermaids are. I have been below the golden haired mermaid though. I would suggest this path as it is easier I believe.
Ok so not when you go down the tunnel you come into a small room with a door in the side. If you go through this tunnel it loops around a little but then comes out to a room with 3 other doors in it(4 doors total).(will add pic of room once I get it)
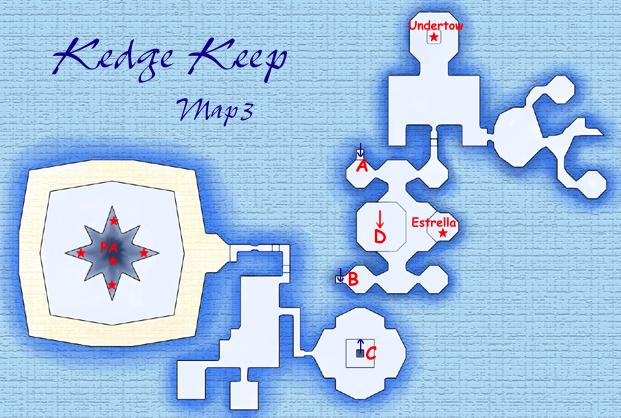
I would advise you to pull to this section for a while longer. This area is remote from any spawns and large enough to move around a little to fight. This is labeled as "4 room" on the map. Make sure your group does not wander off around here, they could get you in trouble. Only have the puller moving around. If you go right or strait it in turn leads to the same spot. A tunnel that goes down a little bit and then has two choices, go out into a bigger room or go down and over into another tunnel.(will add another pic) If you want to go into the bigger room be VERY careful. In this room there are a LOT of sharks. This is labeled on the map as "Lots of hammerhead and cauldron sharks. I would say there were 5 or more sharks that I could see when I went in this room. I would advise using invis when you go in this room for the first time so you can see what I mean. You may want to just skip this section entirely since it leads nowhere else. I did find out that this room is where Cauldronboil spawns. He drops a sharkjaw cutlas commonly or kedgemail gauntlets rarely. It is safer for the raid to skip this part if Cauldronboil is not up. Remember to pull what you want back to the 4 room so you dont get more later on in the fight. If you pull you know you can take them or evac right away. Well this room is a good spot to prepare for Estrella's pull. If you look on the map, if as soon as you came into the 4 room you went left, it goes down a short hallway, then up and across then down a tunnel. This tunnel is labeled as B on the map. If you look on the third map you see where B comes down. This is only like one rooms from Estrella. First thing you see when you come down this tunnel is a Gloomwater mermaid off the small room down a little ledge.(will add pic also)
When you pull this one another you cant see will follow. Pull these two back to the 4 room and kill them there. Once those 2 are killed go back down to the same spot and move off the little ledge to the spot the mermaid was. Do NOT go through the arch on your left, in fact keep away from it or you will agro Estrella. If nothing is agroing you in this section call the group down the tunnel and have them wait up on the ledge spot where you pulled the mermaids from. Once all are ready get ready for a good fight. If you look through the arch you can see two mermaids on the left, one far off on the right and Estrella on the close right.(another pic soon)
If you try to pull any of them all four will come. Now is the time for Estrella. Pull her to the spot where the group is and kill her first. Then finish off the other mermaids(should be 3). You may need to random on some items she drops before the fight is over so make sure the group who kills Estrella checks the loot when she is killed. Some of her items are no drop. I would suggest simple /random 100 so you can see who the winner is easily without doing any math with master rollers. Once Estrella is done and all the mermaids are finished you can rest up a second. If you look through the arch you can go strait across and come to a room like the one your group is in. Another two mermaids will be in here, I would just move the whole group over to this room and kill them there. They are easy after fighting Estrella. After this room is clear and you see no mermaids around besides through the top of the Estrella room you can med up for more. Now if you look into the Estrella room her spot is on your left. When ready go up to your left if looking in the Estrella room, there is a tunnel going up off the far side of this room. Once you go up this area opens into a large room.(pic here later)
There are a bunch of stingtooth piranhas in here. Pull them all down to the room near Estrella. Once there are no more piranhas that you can see have your group get FM. You are now ready to kill some seahorses. In the room you been pulling from you can go strait out from the tunnel you came up, there is a room that comes off the end of this large room. In here are two or three seahorse. The pedistal in that room is the spawn spot of Undertow, a named seahorse. Pull these back down near Estrella and kill them there. You may need to clear the mermaids again now as they are probably respawning if not already up. This section is all clear and nothing left to do now. Now go back across the Estrella room to the other side where you killed her. Go back up the tunnel and back to the 4 room. Med up and get ready for more fighting. You are now on the way to Phinigel Autropus. Everyone should stay in the 4 room for now. The puller should go strait out and over near the shark room. Instead of going into the shark room go down into the other tunnel there. (pic here soon)
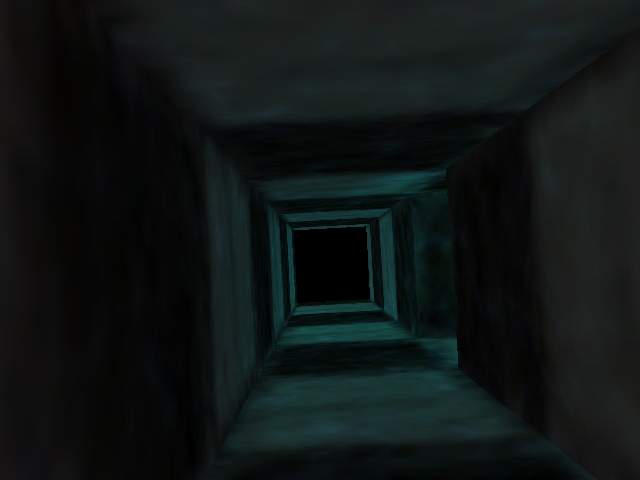
This goes sideways then goes up a ways. When you get to the top if has a "cap" on it with like windows. If you go out the window you come into a big pit. There are sharks all around in here that you should pull back down to the 4 room. Once this pit area is clear call the group up the pit. Make sure everyone knows the way and does not go into the shark pit and pull them. Now once you are all in the pit you can go up out and into the large room to look around. Pull any stray sharks or fish into the pit and kill them. Once this is all clear have your group move up into the room on one side of the pit. You will find a door on one side. This door leads to a spot with another room. If you look around in this area there are seahorses and sharks. Make sure everyone in the group has magic resist now. When all ready to fight you, the puller, should look into the room for the seahorses. They wander in this room so watch them untill they are far enough apart to pull single. Pull them back to the room with the pit and kill them. Go back and get the next and pull it also. Once this room is clear have the group move to this room. You are now only one room away from Phinigel! You should buff your entire party with all the hit point and ac buffs you can. Make sure everyone has magic resist also. Give your main tanks the really good symbols as they will need them. The puller should also get ruin III to ease the damage taken while pulling. Now when all buffed you are ready to move. From the tunnel you came into this room from if you turn right there is another tunnel going out. This tunnel leads to Phingels room. The puller should go out here and stop at the edge and then tell the group to come through and not go past him or the ledge. Once everyone is on this ledge you are ready to start pulling Swirlspine Seahorses. If you look off the ledge you can see how the room is a giant circle and it goes down.(another pic soon)
Go off the ledge a little and go down. You should now see that at the bottom of this giant pit there are pillars and at the base of the pillars there is a star shaped hole going down. Do not go down this hole yet.(pic of star hole soon)
At the base of each pillar or corner of the star there are seahorses. These are tough to pull as they cast a spell that stuns and spins you for a while. Avoid this by having high magic resist. Well pull these one at a time back up top to your group on the ledge. If you pull the closest ones first you should only get one at a time. From the first pull you should start a time clock. The seahorses have a 15 minute spawn time. This means you have about 12 minutes from the first dead seahorse till when you pull Phinigel. Once all the seahorses around the edge of the star are clear check the timer. Only thing left is Phinigel and two Swirlspine Guardians. You should check the edge of the star again to make sure none are left. You should of cleared all the seahorses around the edge in less than 10 minutes. If you are almost out of time I would suggest waiting for the respawn and do it over. Once you have enough time left it is time for Phinigel. Get another ruin III for this pull. When ready go down the center of the star. I floated down instead of swimming. You can look around and see where Phinigel is this way. You may be able if lucky to pull a Swirlspine Guardian alone if it is not near Phinigel but it is unlikely. When I went down I could just make out the figure of something and then it charged at me, it was Phinigel and the two Guardians. Pull these up top to the ledge and focus on Phinigel. Enchanters can mez the guardians so make sure you are on Phinigel. Be very carefull while fighting Phinigel to not drown. He casts a spell that dispells enduring breath. Make sure everyone has a water stone and endure breath potions/aqualungs. Or can cast breath on themselves. I was dispelled four times by him as the main tank. Once Phinigel is dead check the loot quickly. Most of the items he has are no drop lore items. You should random these off as soon as possible so they do not rot. Or to ease the tension you can random all possible items before even attempting Phinigel so you dont have to worry about this. You should be able to do this while the Guardians are still mezzed though. Once the loot is done you can now focus on the Guardians. These are just as tough as Phinigel in my opinion because everyone is low on mana. The casters should med up till they can blast and let the tanks go to work. Healers hopefully still have some mana to complete heal the tanks taking the damage. Once the guardians are both dead you can now officially claim a successfull Kedge Keep raid! Do not forget to check the guardians for loot. They drop swirlspine belts rarely(haste sashes with 6ac). These are tradable so can be looted as soon as they are killed. By the time these are all killed the other seahorses will be respawning if not already up. You can choose to all evac out and call it a night or stay and camp the seahorses and guardians for experience and hopes of getting more belts. Phinigel is an 8 hour spawn so dont hope for him to be up soon. Will post a pic of Phinigel when I get a good one myself.